When you come to the Sign On Screen you will be able to see all the features as
in the image below. Pick the user name you want to login as, type in the password
(unless if you have select the option of save password, or you are using Current
ISP/ LAN). Select the location that you
are logging in from (for example: home or office).
Click on Sign on button, or simply hit Enter key, and it should start dialing
the number that you have selected. 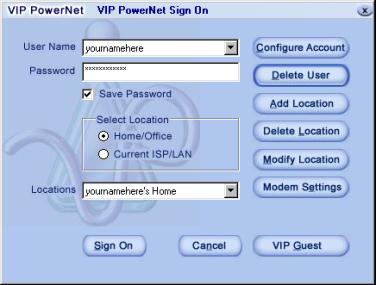
a)
Congifure Account
VIP PowerNet provides its users with a unique feature
of Configuring new account(s). There are instances when user(s) will be using
his/her VIP PowerNet account from more than one place, for example Home/ Office/Laptop.
In such cases this feature is useful for allowing them to add their user name(s)
in the Sign On screen. Click
on Congifure Account on the right of your Sign On screen
Then enter
your username and password and click on OK.
b) Delete User When
clicked on this button it will pop up with the window prompting you if you would
like to delete the particular user name or not. If you click on Yes then it will
delete the user name from your computer, but it doesnt delete the user completely.

c)
Add Location
When you click on Add Location it pops up with the following
window. 
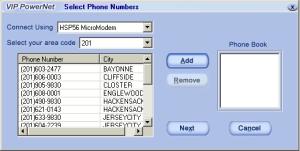
After
you enter a name for the location it will take you to the next window of selecting
the phone numbers. Select the number that applies to you and click on next button.
After
you click on the next button it will take you to the next window, which will have
your selected phone number along with dialing options 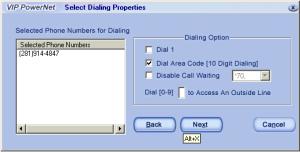
After
confirming all the information, if it is correct, simply click on Next to finish
adding location. When clicked on Next it will bring the following screen. 
When
you click on finish it will bring you to the main Sign On screen and in the Locations
window drop down list, you should be able to see the new location that you have
just added d)
Delete Location When
you click on this button, it will prompt you if you want to delete the selected
location, when you click on Yes, it will delete the location from the drop down
list of Locations. 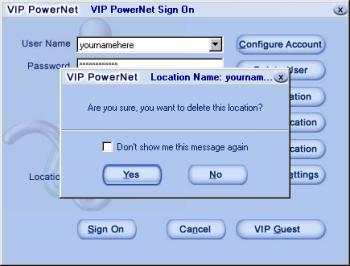
e)
Modify Location When
click on this button it will bring the following screen with the phone number
shown in the Phone Book section. Remove the number that you do not want, and replace
with the modified number. Select
the number that applies to you by highlighting the number and click on Add. After
you click on add it will show the number in the Phone Book section. Once you have
selected the appropriate number(s), then click on Next. 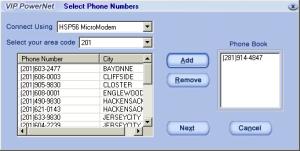
After
you click on the next button it will take you to the next window, which will have
your selected phone number along with dialing options. 
After
confirming all the information, if it is correct, simply click on Next to finish
modifying location. When clicked on Next it will bring the following screen. 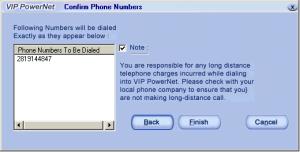
When
you click on finish, it will bring you to the main Sign On screen with the modifications
already applied to the Location that you just selected. So when you dial again
with the same location it will dial with the modified number. f)
Modem Settings When
you click on Modem Settings button, it will pop up the Modem Properties window,
showing the modem(s) installed in your computer. 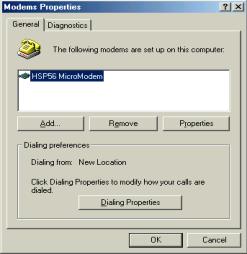
Change
the settings according to your needs and click on OK' g)
VIP Guest 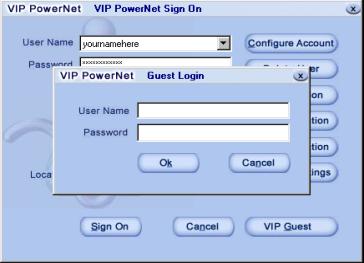
This
feature allows you to check your e-mail from a computer other than yours, that
has VIP PowerNet installed, by logging in with your User Name and Password. This
will leave the copy of your e-mail on the server and it removes all the e-mails
from the guest computer once you log out, and it also doesn't save your user name
and password in the sign on screen. h)
Sign On and Cancel When
you click on Sign on button, it will start dialing the selected location number,
and once you are successfully connected, you will be ready to surf the Net. If
you want to cancel dialing, click on Cancel and it will stop dialing. |